
How to setup a NSX-V LB for vIDM
Recently I wanted to deploy a VMware Identity Manager 3.3.2 cluster with vRealize Lifecycle Manager 8.1. As a prerequisite I needed to prepare the vIDM Load…
Recently I wanted to deploy a VMware Identity Manager 3.3.2 cluster with vRealize Lifecycle Manager 8.1. As a prerequisite I needed to prepare the vIDM Load Balancer. Unfortunately I was not able to find a complete overview on how to configure this with NSX-V 6.4.6. After some research and reaching out to others, I was able to find all the information I needed. This article reveals how I configured the NSX-V Load Balancer for the vIDM 3 node cluster.
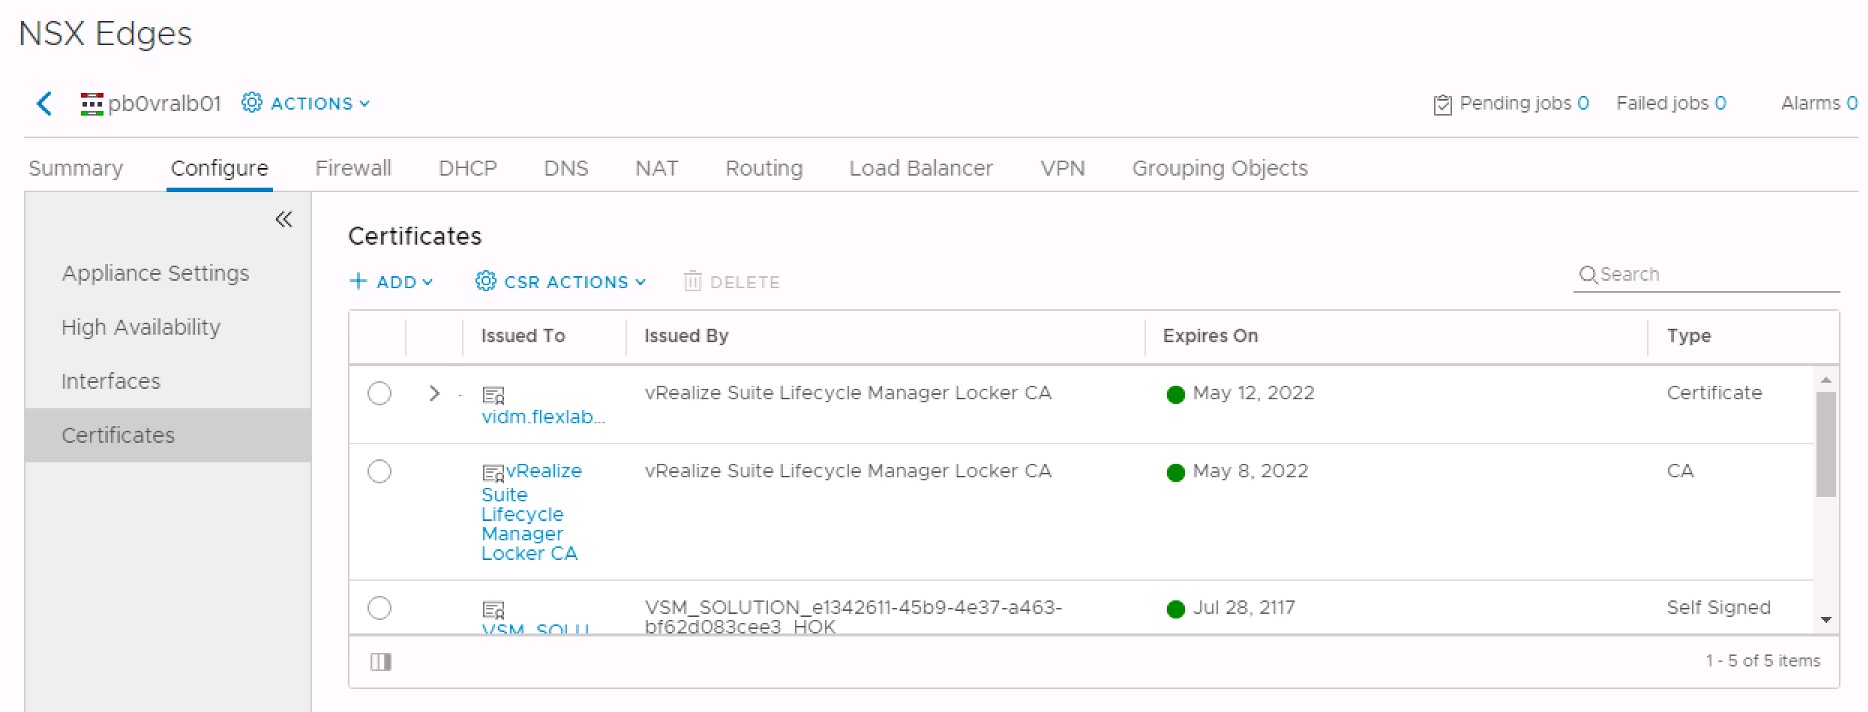
Upload vdim certificate chain and the corresponding root CA certificates:
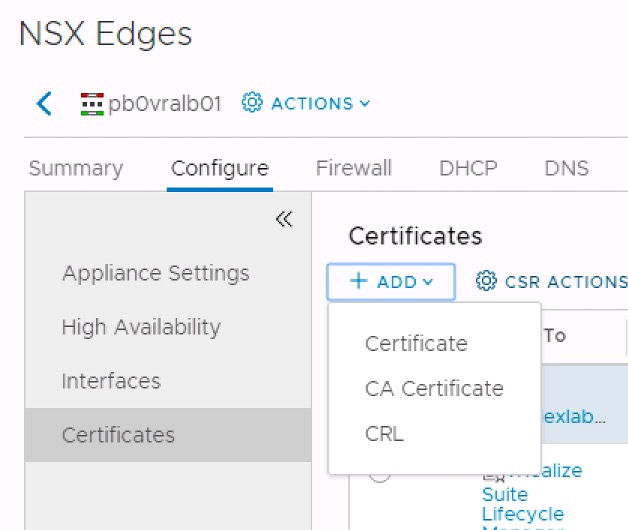
[vIDM Certificate Chain]
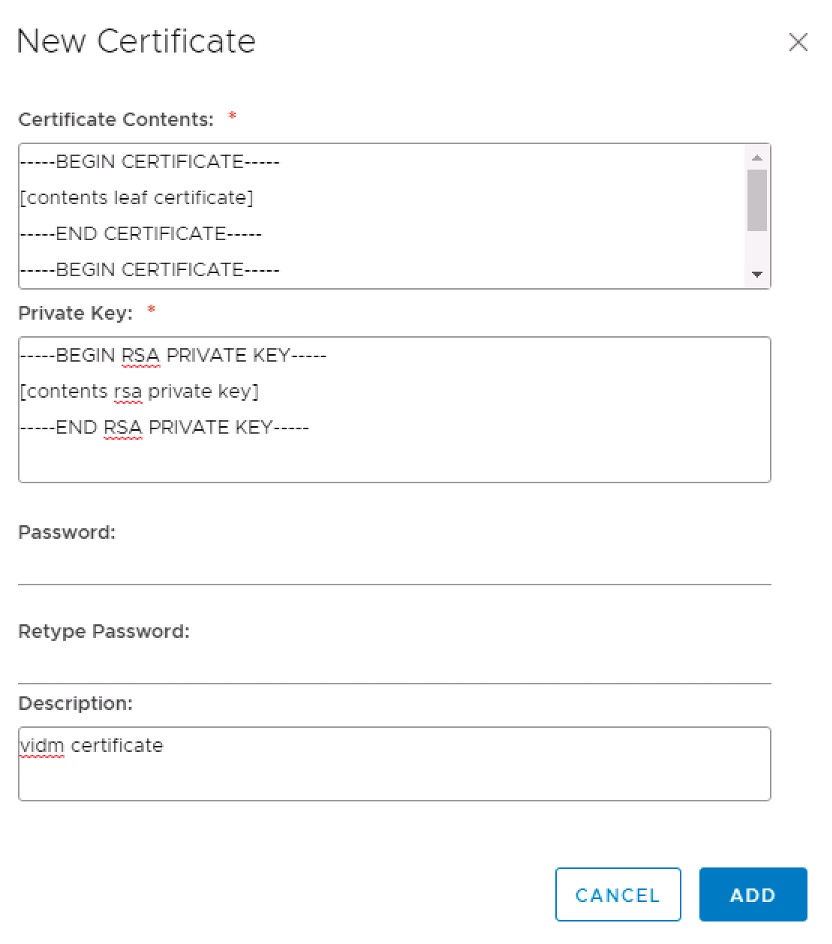
*In the field “Certificate Contents” add the entire certificate chain. Just like the below example.
-––BEGIN CERTIFICATE—–
[contents leaf certificate]
-––END CERTIFICATE—–
-––BEGIN CERTIFICATE—–
[contents root ca]
-––END CERTIFICATE—–
*In the field “Private Key” add the private key of the certificate in rsa format. Just like the below example.
-––BEGIN RSA PRIVATE KEY—–
[contents rsa private key]
-––END RSA PRIVATE KEY—–
Note: If your private key does not start with —–BEGIN RSA PRIVATE KEY—–, than you have to convert your private key first before NSX-V accepts your private key. You can do this for example with openssl. See my example below.
openssl rsa -in vidm-private-key.key -out vidm-private-rsa-key.key
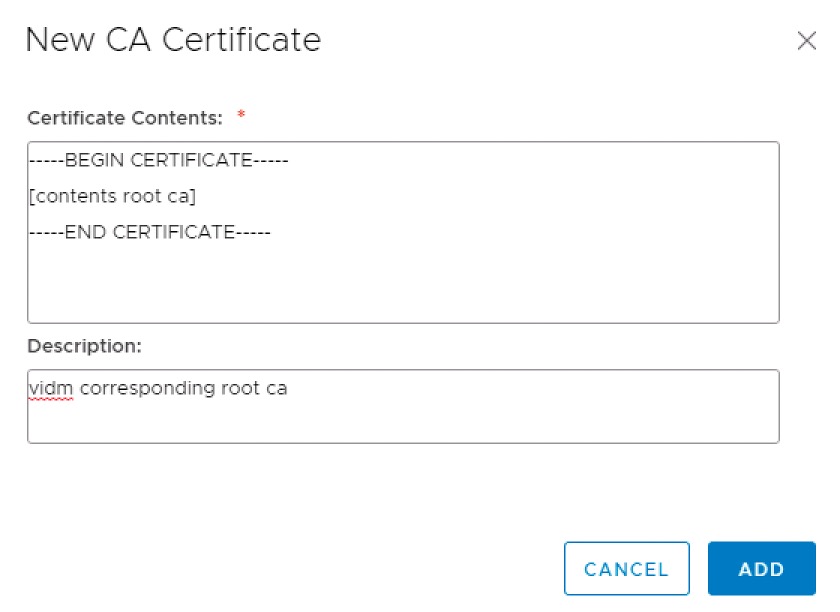
[Corresponding Root CA]
Configure the Application Profile:
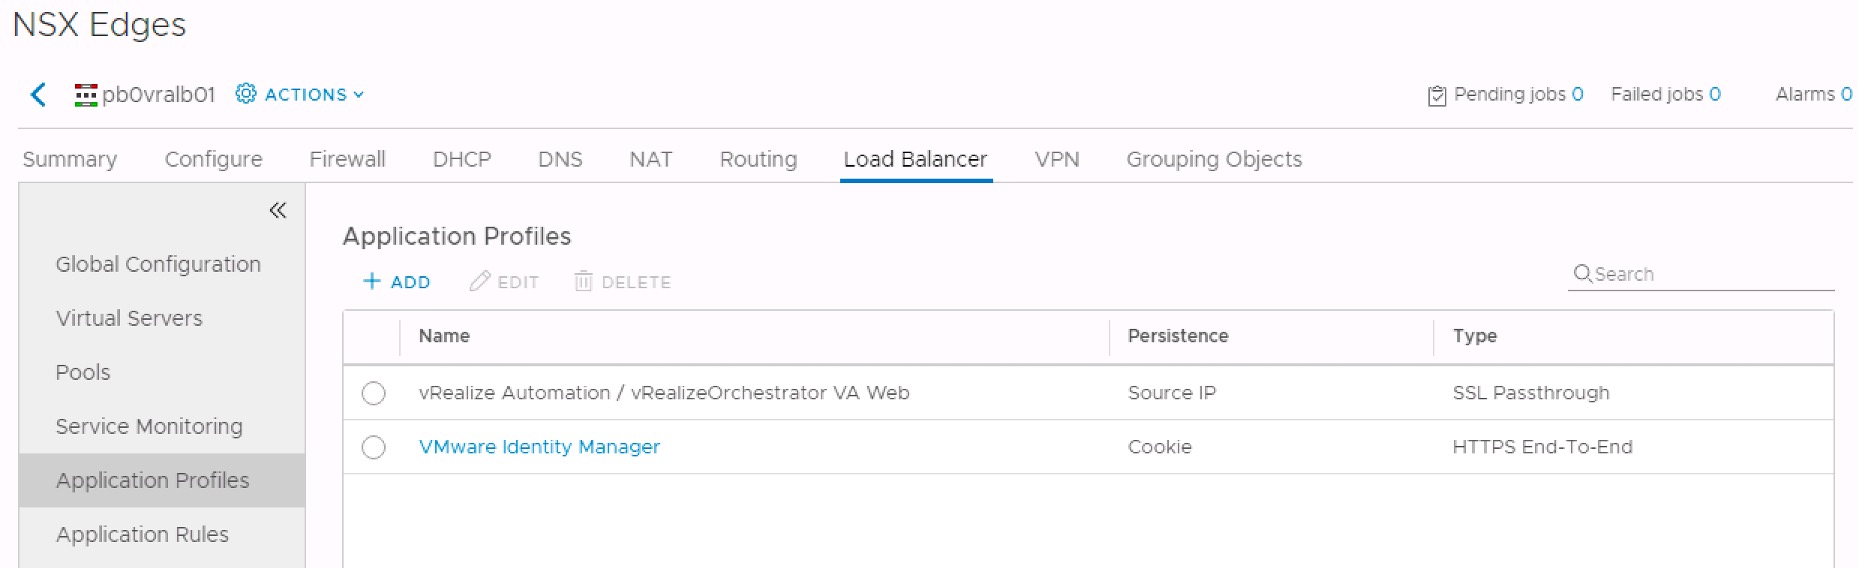
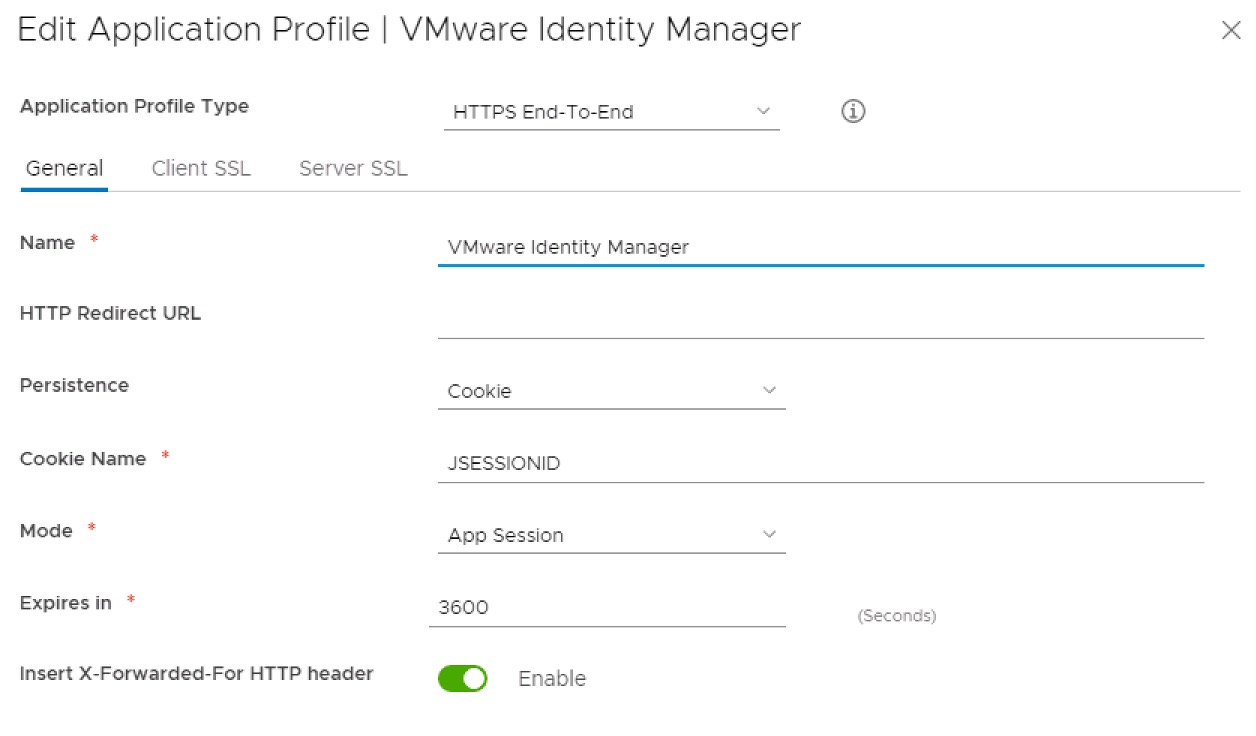
Application Profile Type: HTTPS End-To-End
Persistence: Cookie
Cookie Name: JSESSIONID
Mode: App Session
Expires in: 3600
Insert X-Forwarded-For HTTP header: Enable
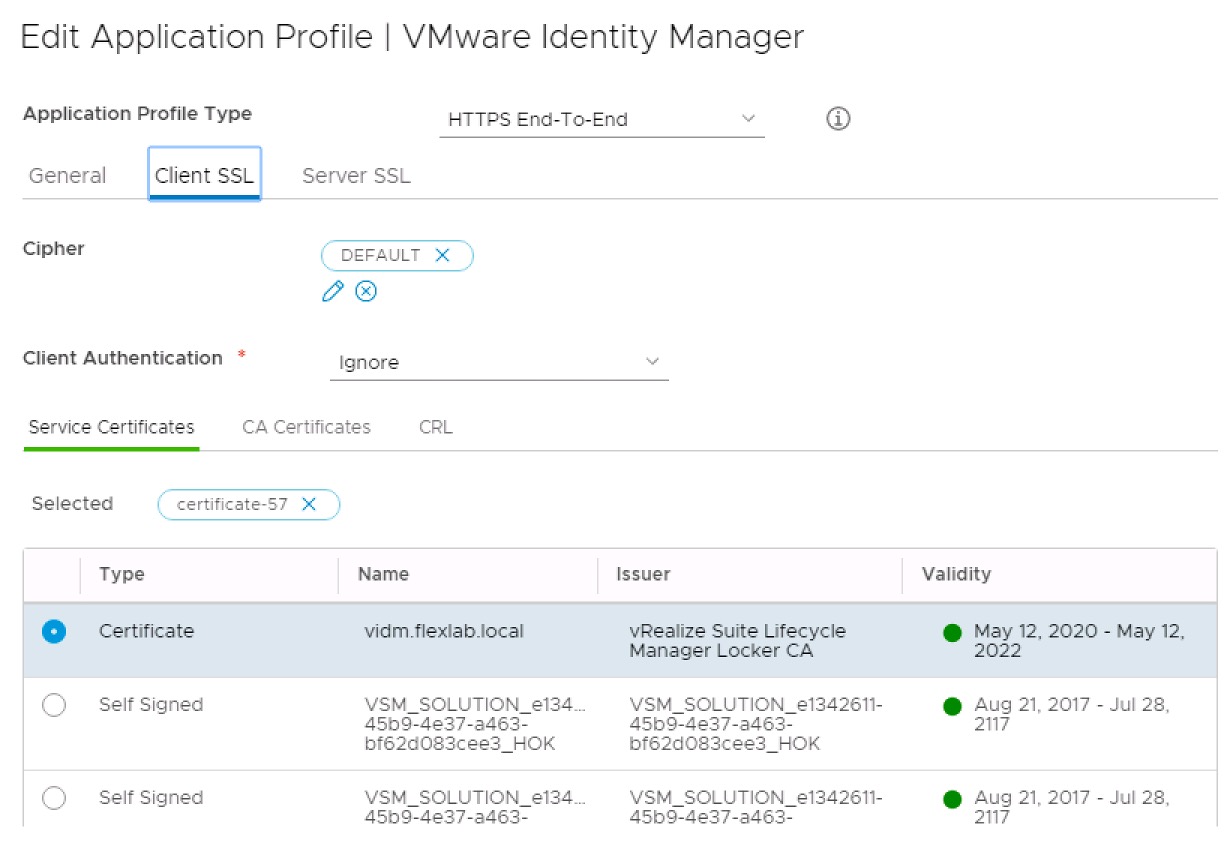
Client Authentication: Ignore
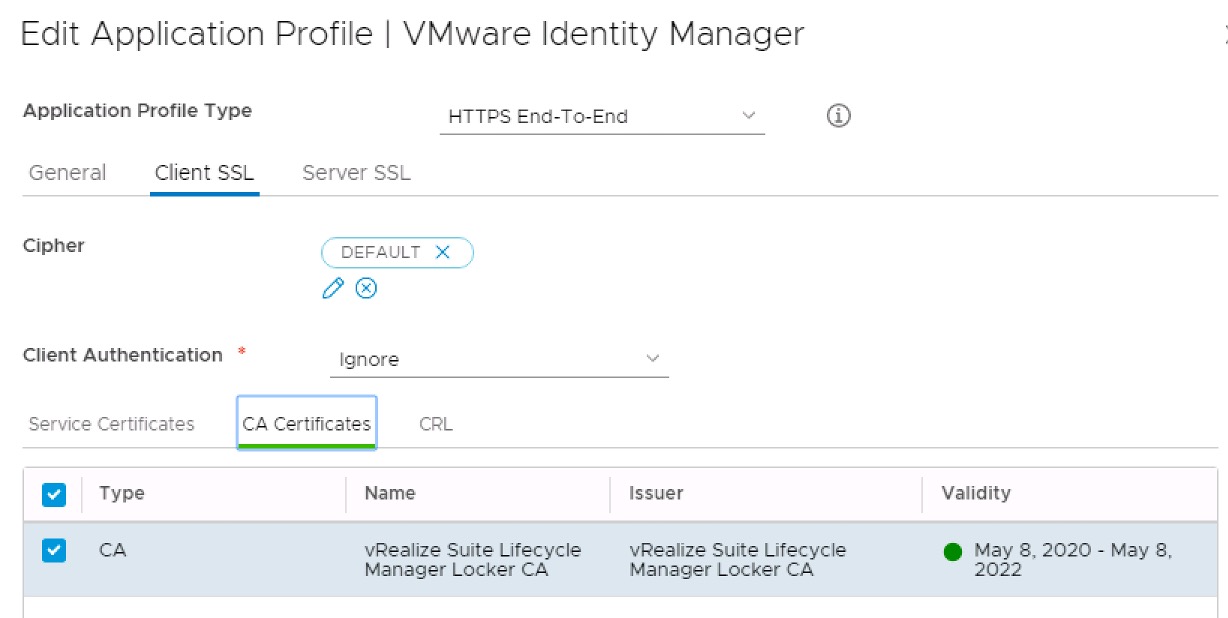
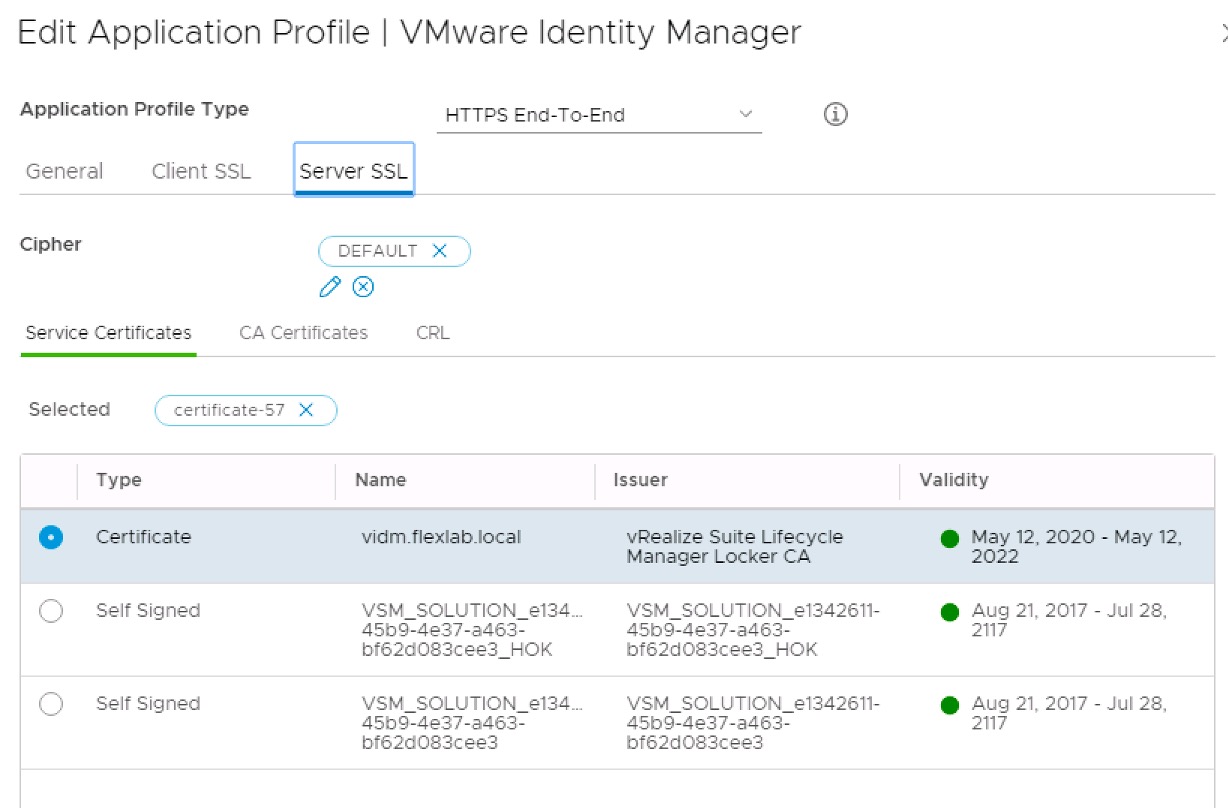
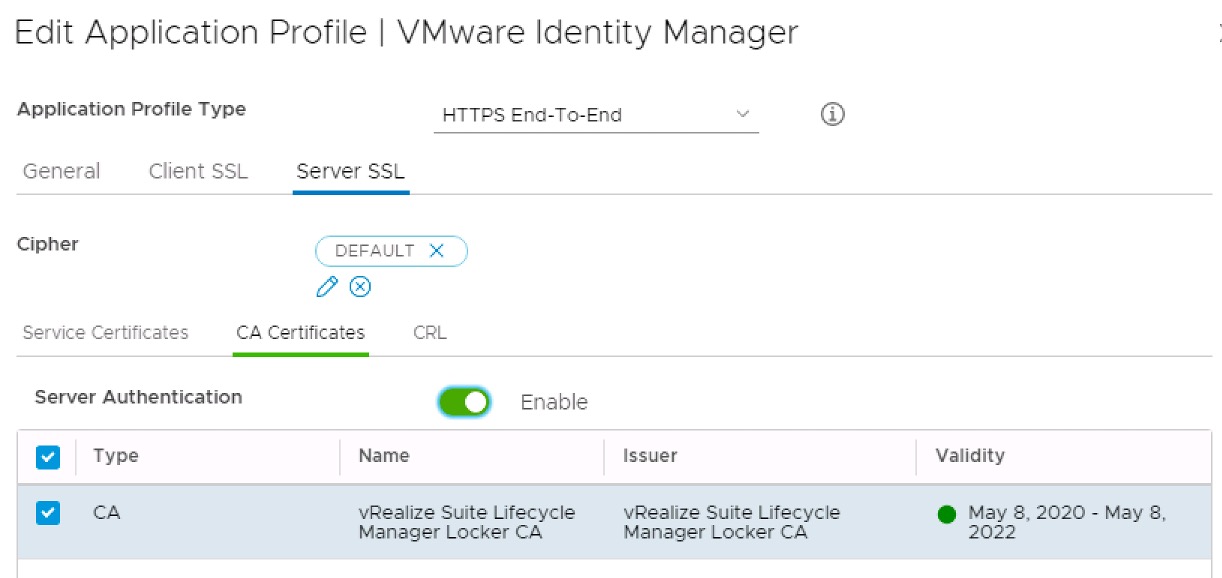
Server Authentication: Enable
Configure the Service Monitor:
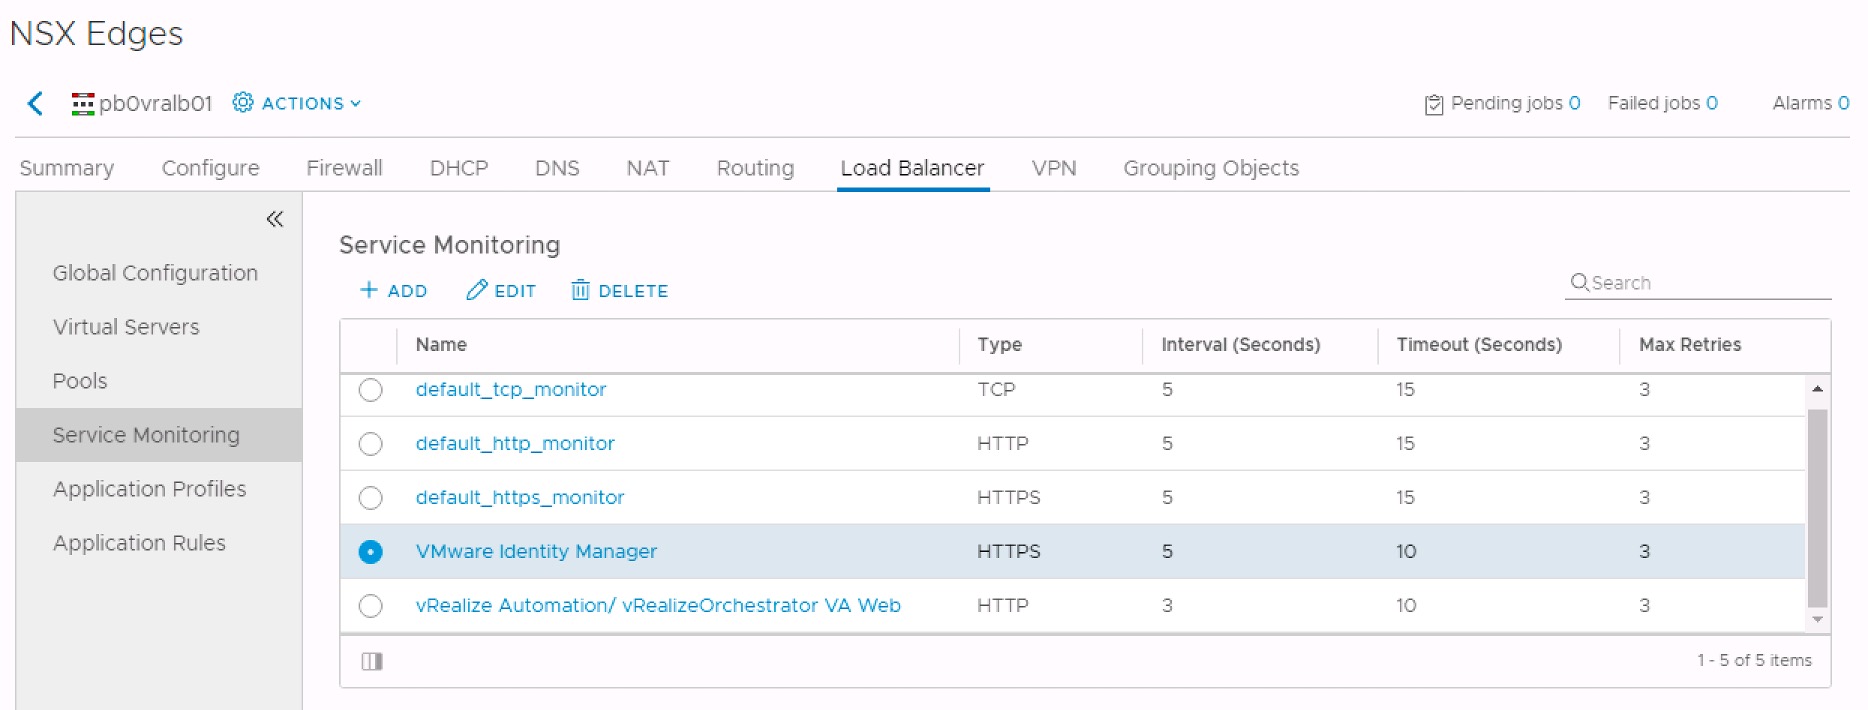
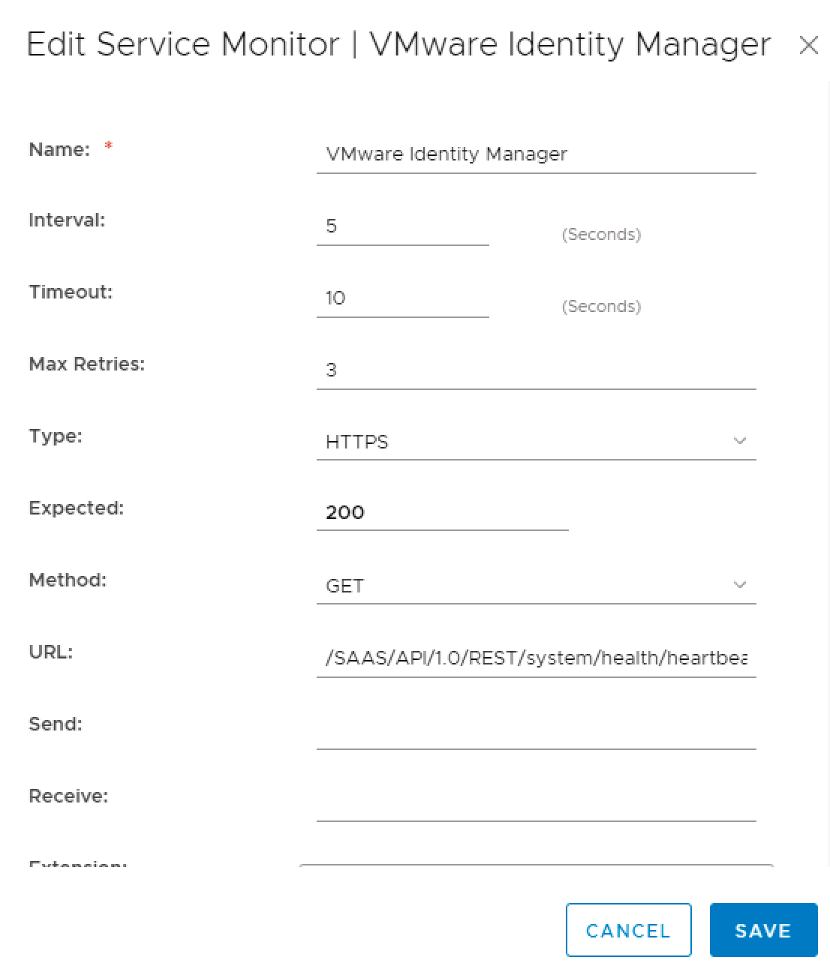
Interval: 5
Timeout: 10
Max Retries: 3
Type: HTTPS
Expected: 200
Method: GET
URL: /SAAS/API/1.0/REST/system/health/heartbeat
Configure the Pool:
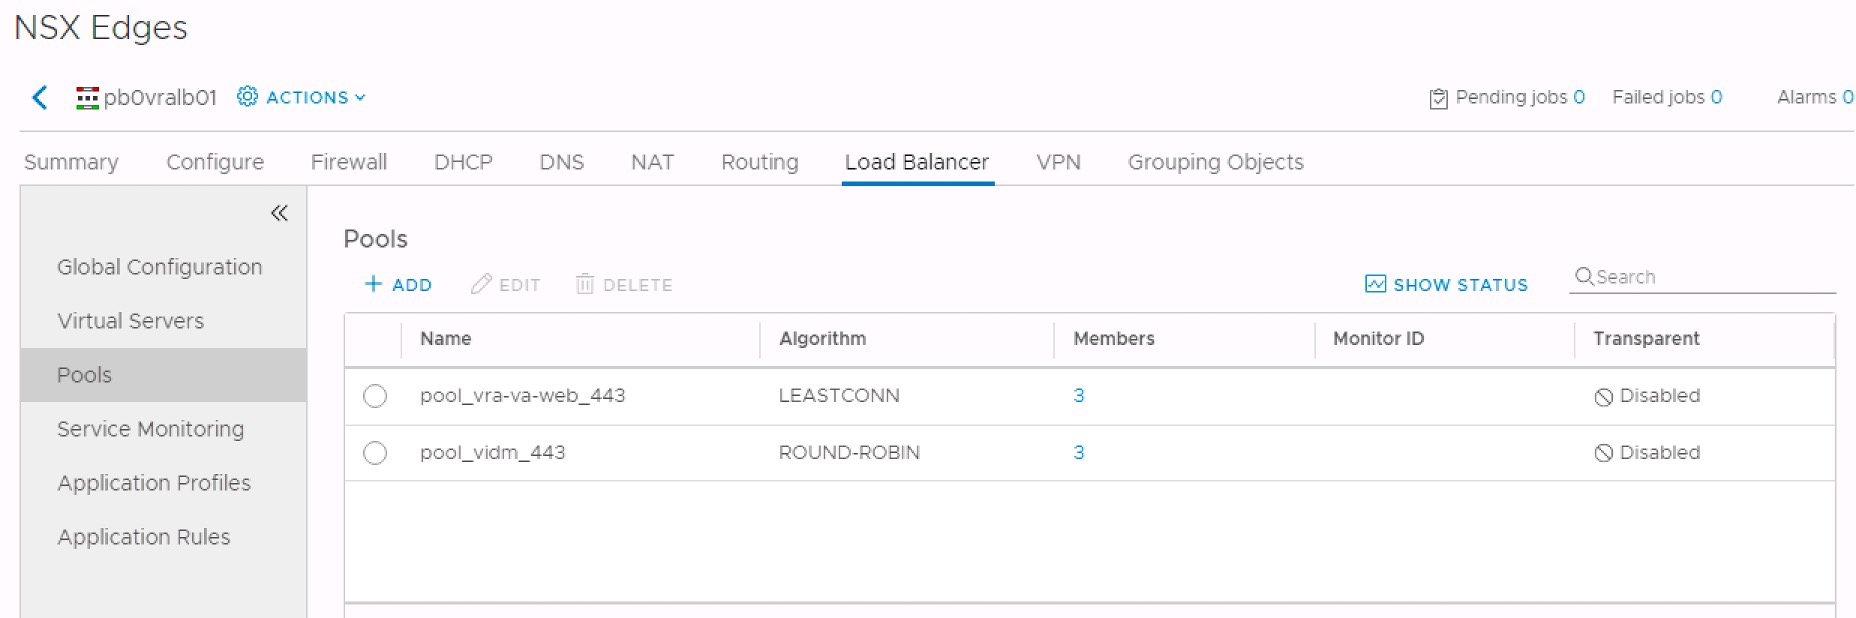
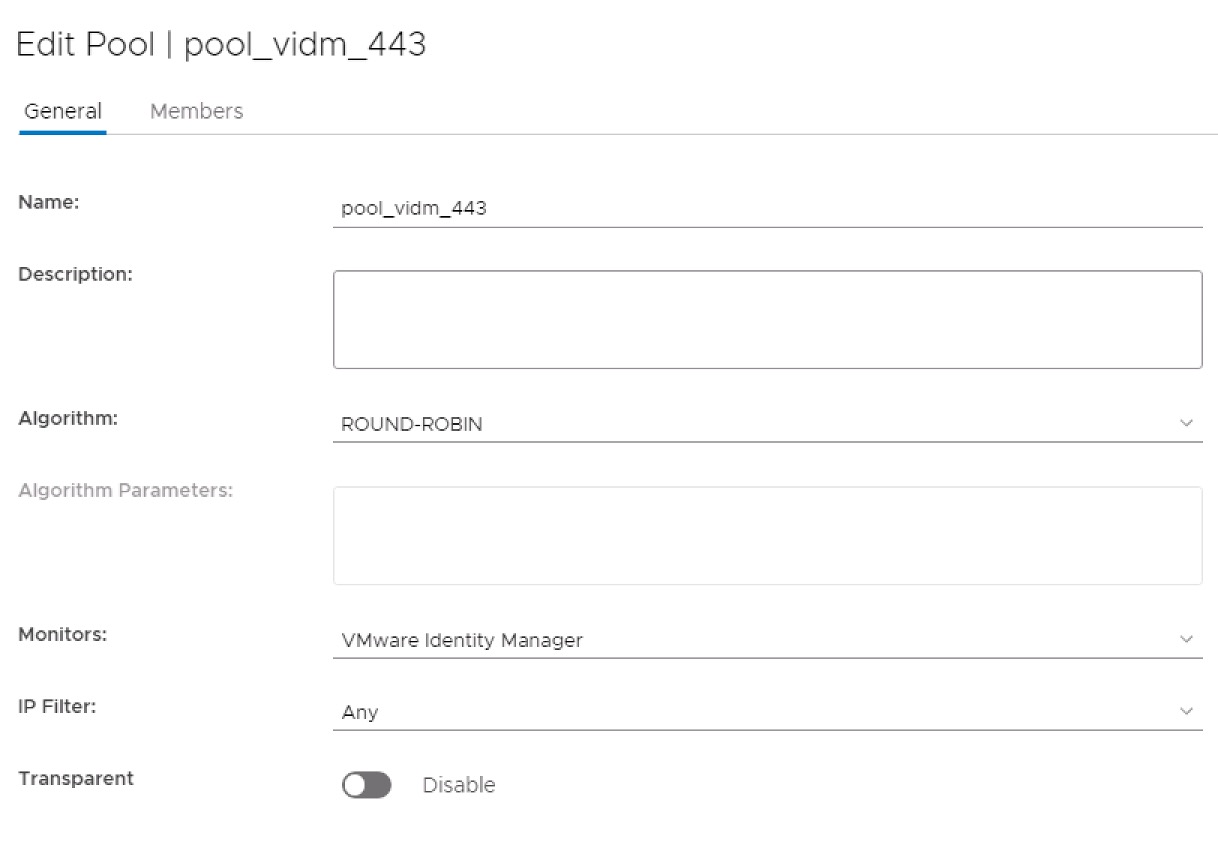
Algorithm: ROUND-ROBIN
Monitor: VMware Identity Manager
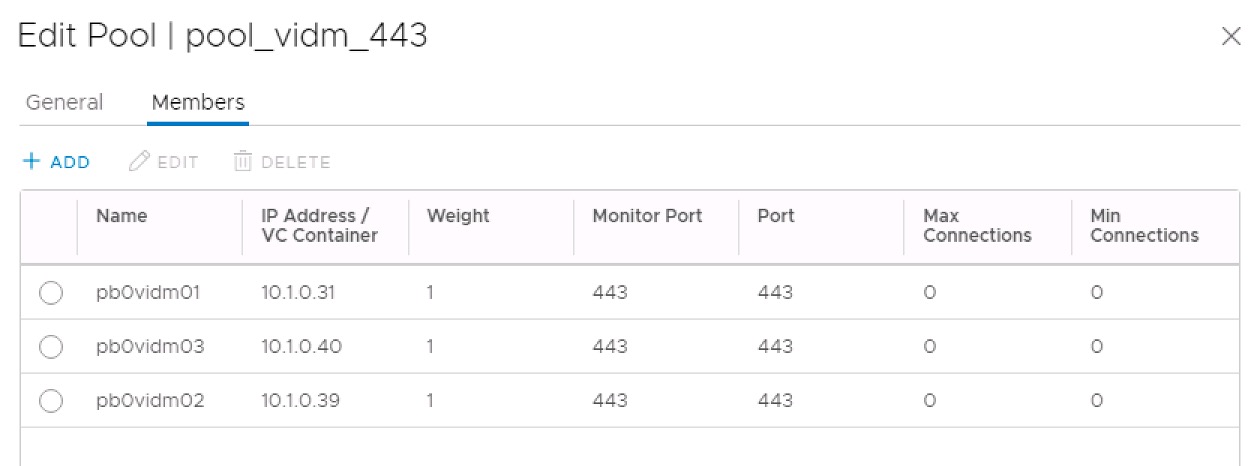
Weight: 1
Monitor Port: 443
Port: 443
Configure the Virtual Server:
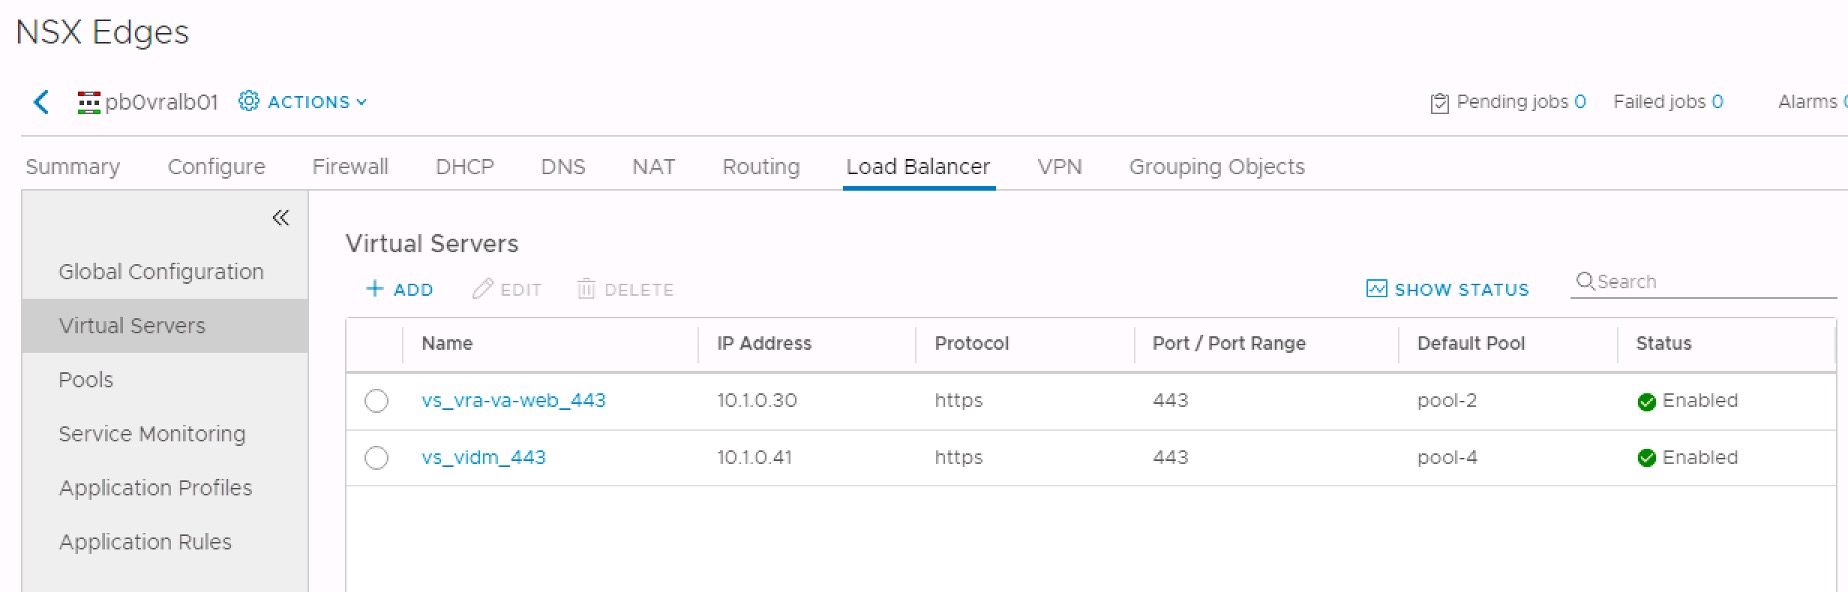
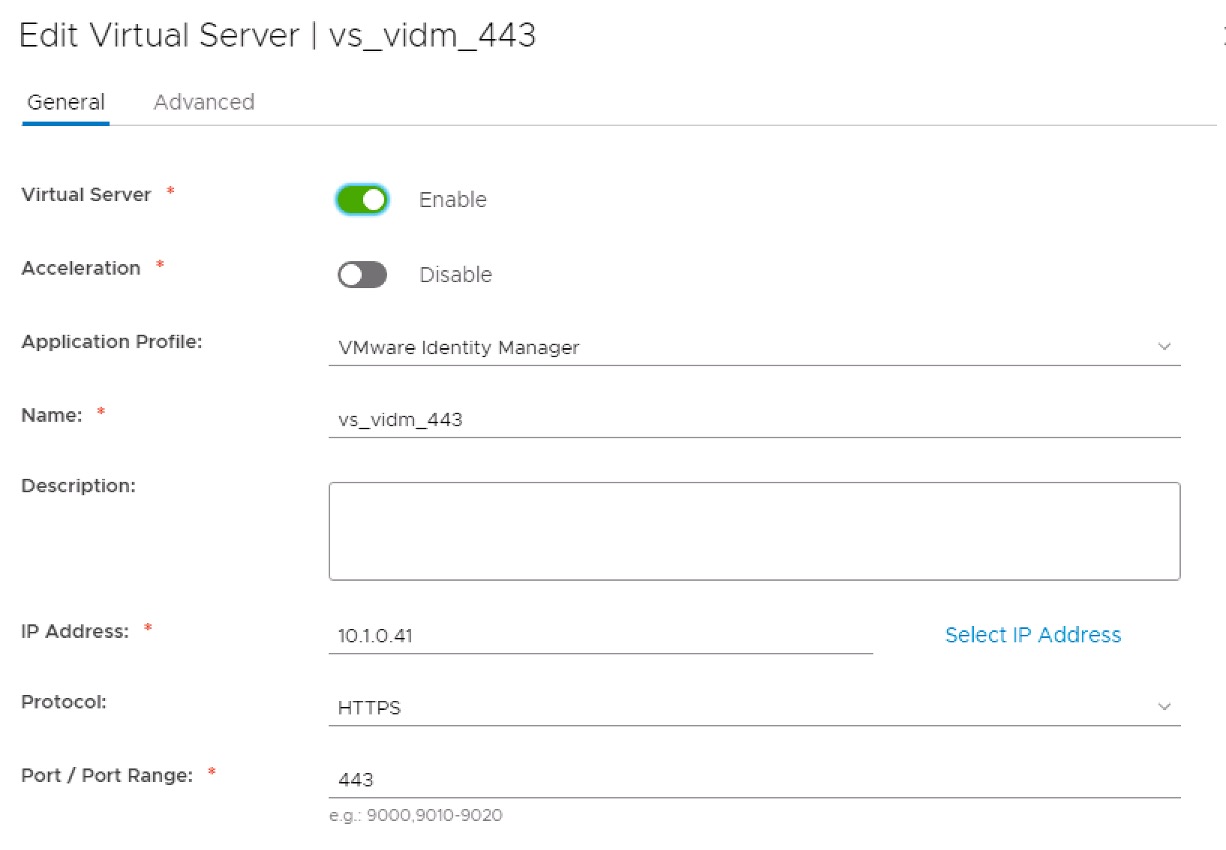
Virtual Server: Enable
Acceleration: Disable
Application Profile: VMware Identity Manager
Protocol: HTTPS
Port: 443
Default Pool: pool_vidm_443
Note: To enforce Layer 7 traffic, you need to disable Acceleration on the Virtual Server level.
That’s it… Now you can start deploying your vIDM cluster with vRLCM 8.1.